
XDev AI Studio

Your workspace for building AI applications

From what you know,
to what AI can do.

Connect documents, choose a model, and design how AI works. Build assistants and workflows in a workspace you control.

Chatbots, agents, chatflows, and workflows

From request to reviewed resultInteractive illustration

Sample request

What steps should a new colleague follow on their first day?

Swipe or scroll horizontally to explore the workflow

Request → context → draft → review → delivery
Receive requestInput & variables
Retrieve contextKnowledge & sources
Generate a draftModel & instructions
Apply rulesConditions & routing
Human reviewApproval checkpoint
Deliver & recordOutput & run history
Revise if neededAI Studio · Workflow

See how the pieces connect.

A simulated workflow. No model calls or data sent.

One place to build.
More ways to put AI to work.

Explore AI Studio, from connecting knowledge to preparing an application for your team.

Chatbot / Agent / Chatflow / Workflow

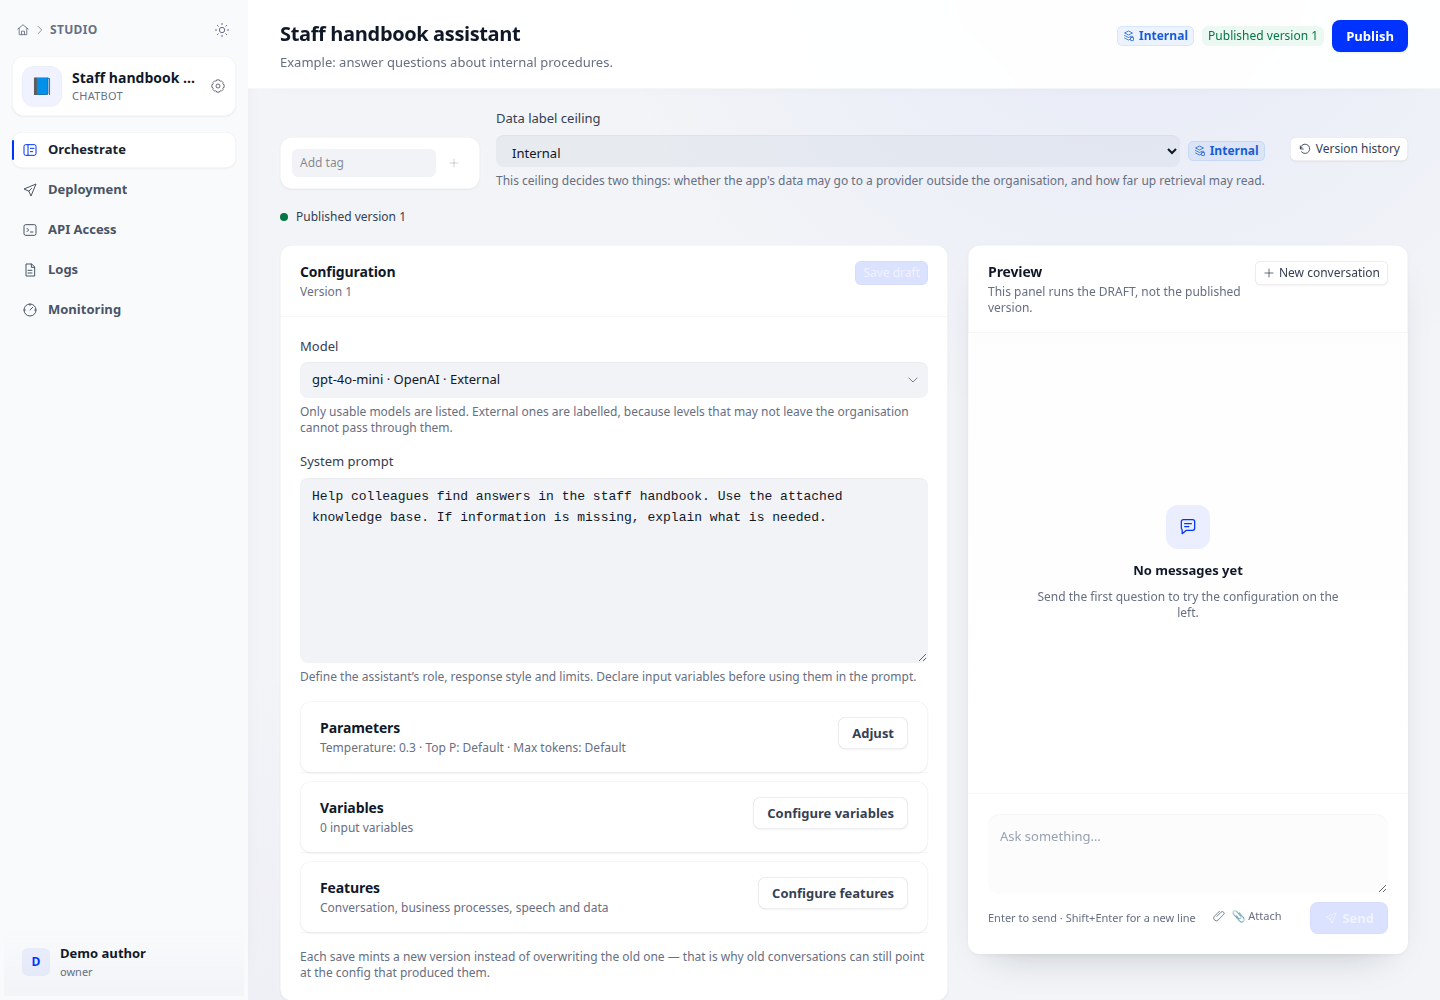
Start with a useful assistant.

Choose an application type, write instructions, and test answers in the preview panel. Refine your draft before publishing.

Read the guide
Applications — AI Studio interface with example data.
AI Studio interface with example data.

Documents / Knowledge bases / Retrieval

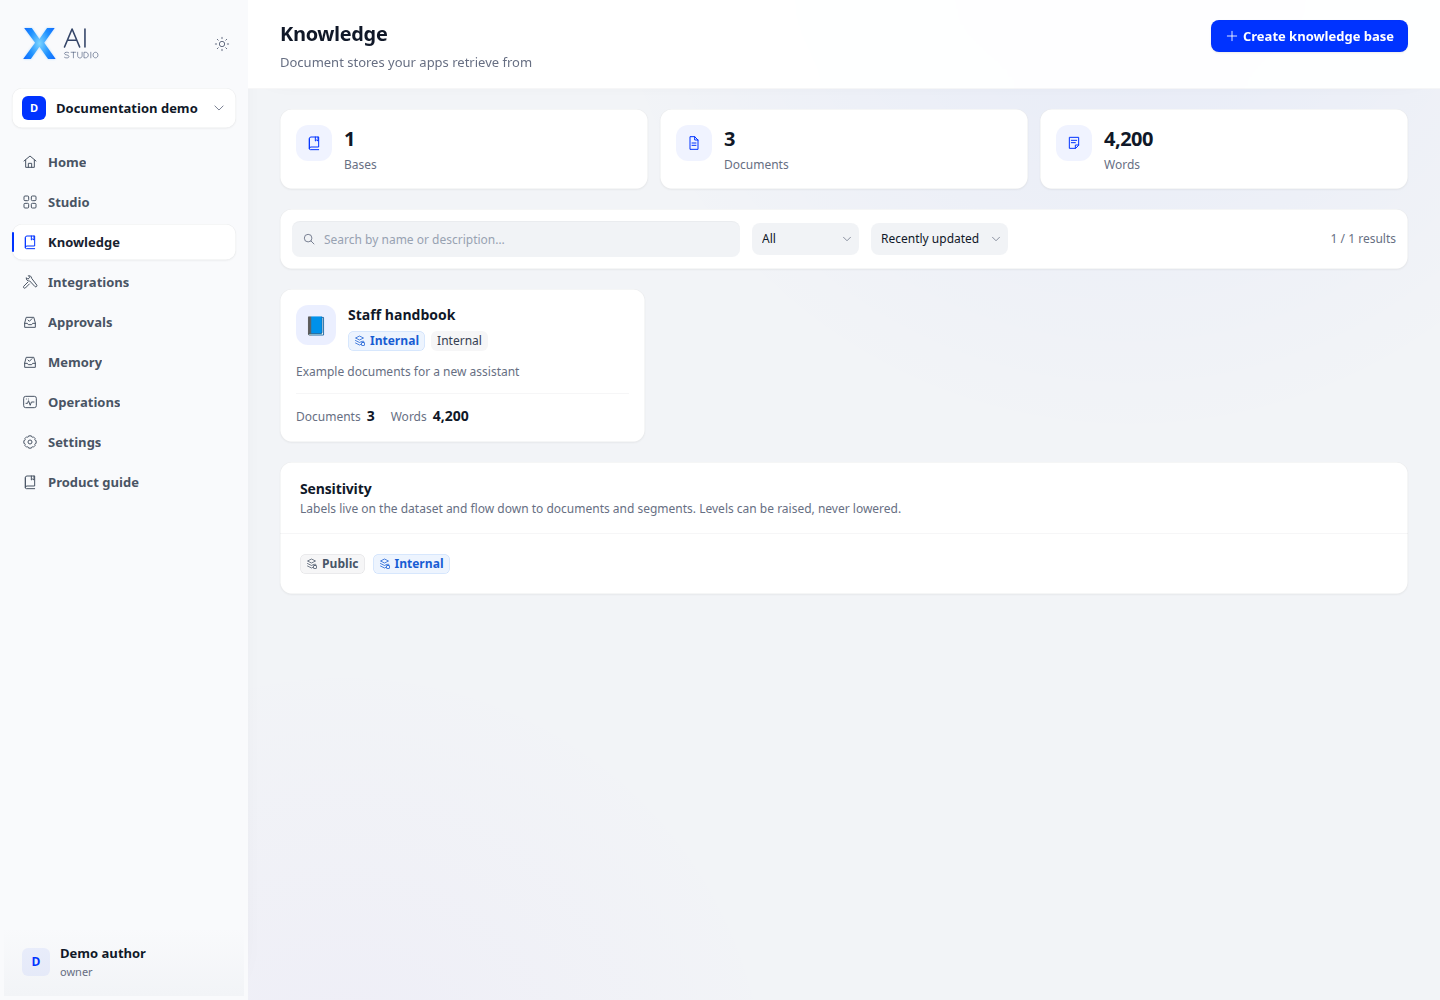
Give your documents context.

Create a knowledge base, add documents, and connect it to your application so AI has the right information for the task.

Read the guide
Knowledge — AI Studio interface with example data.
AI Studio interface with example data.

Inputs / Models / Outputs

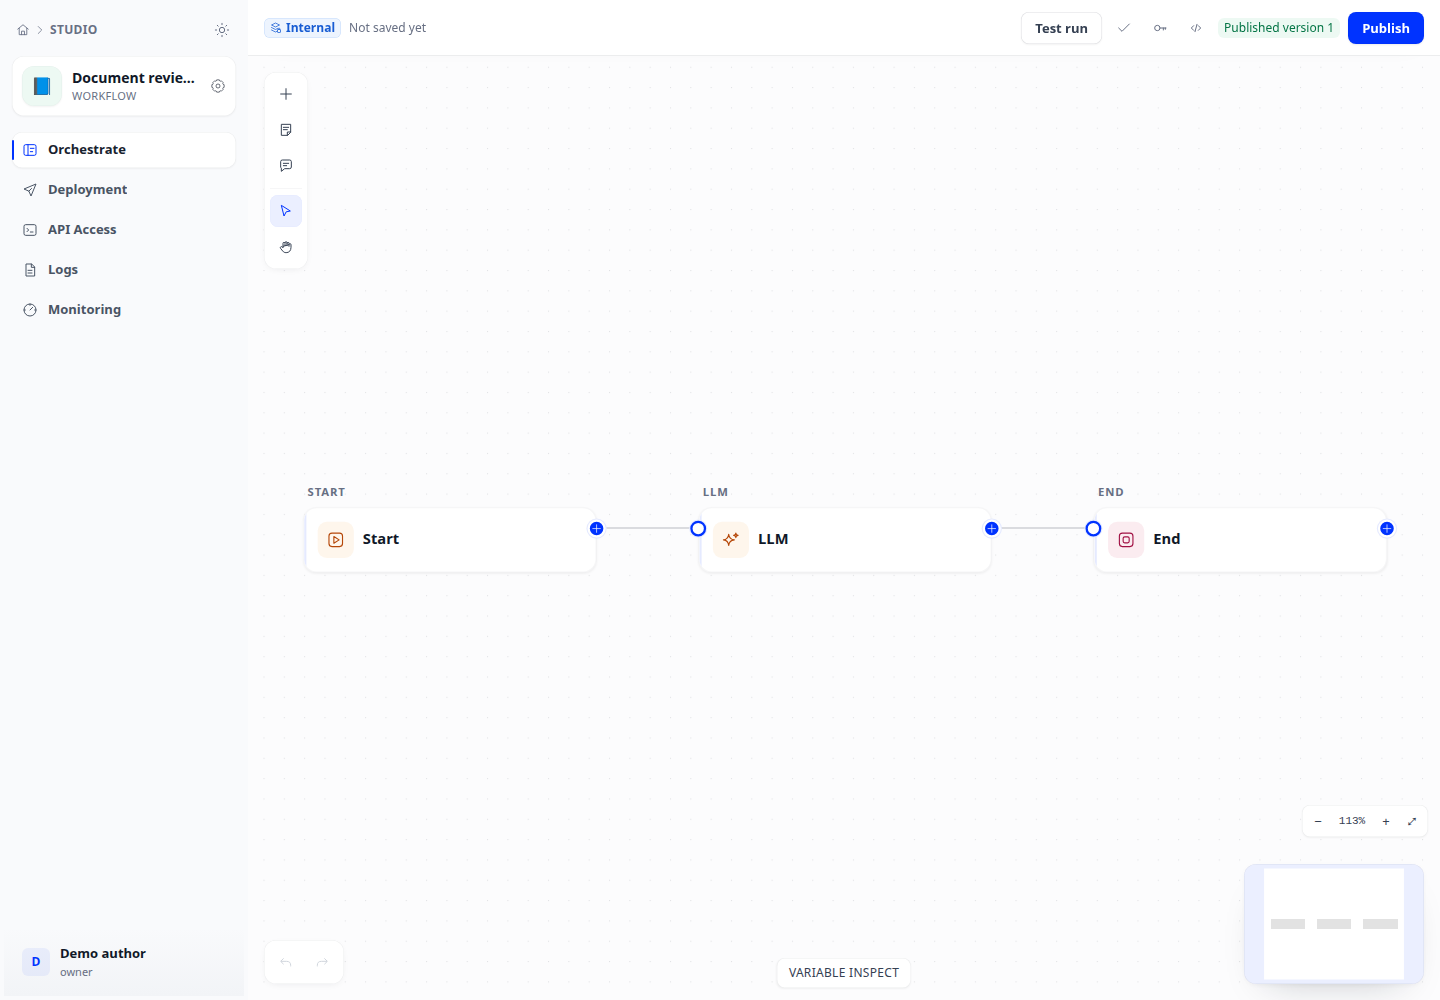
Design every step AI takes.

Connect inputs, models, and outputs on a visual canvas. Extend the workflow to match your team’s needs.

Read the guide
Workflows — AI Studio interface with example data.
AI Studio interface with example data.

Tools / MCP / Operations

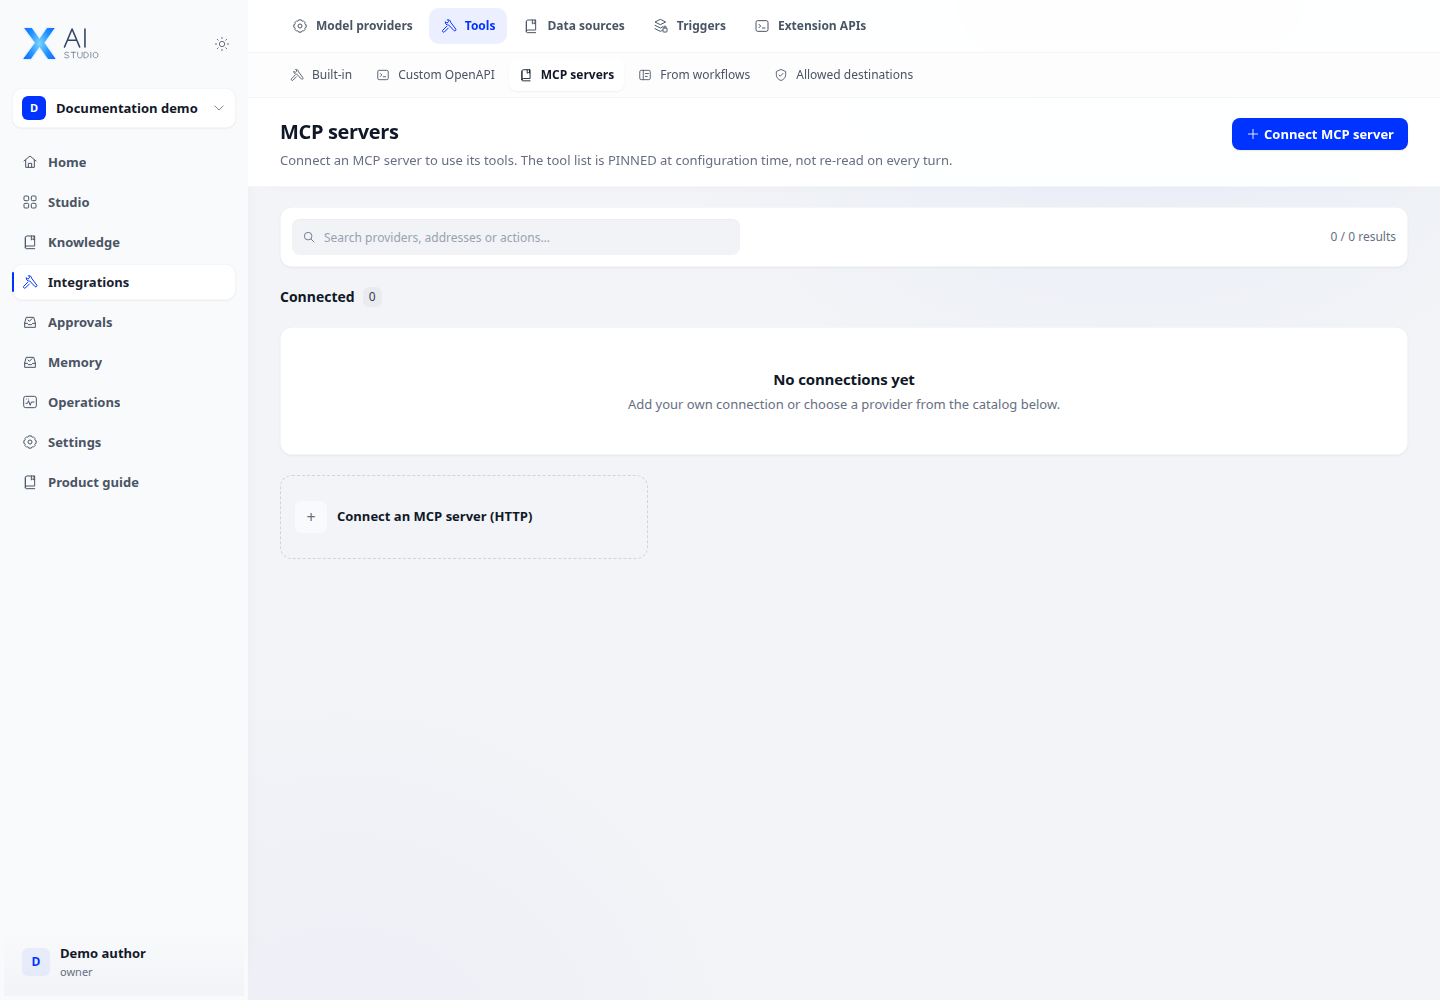
Connect AI to the tools you use.

Explore tools and MCP connections configured in your workspace. Choose the operations that fit your application’s task.

Read the guide
Tools — AI Studio interface with example data.
AI Studio interface with example data.

AI Studio: from a use case to operations

An illustrated use case connects knowledge, AI Gateway, customizable workflows, sandbox execution and data controls.

Choose a chapter · 16 chapters
Read the story

One question. Too many places to look.

An employee wants to understand how to purchase equipment for their team. The answer is scattered across documents, email, and colleagues. Finding a paragraph is only the start. Is it current? Is the employee allowed to see it? And who approves the next step?

One request, one connected process.

Follow an illustrative use case: an internal purchasing assistant. An employee asks a question in an application built with AI Studio. The application finds the relevant procedure, helps draft a request, and passes it to a responsible reviewer. This is a process you can design, not a built-in purchasing system for every organization.

OCR, NER and knowledge pipelines.

Inputs may include documents or images that need OCR to extract text. NER helps identify entities such as personal names, alongside policy-based PII rules. Detection is assistance, not a guarantee that every sensitive detail will be found. Configure processing, chunking, and indexing next. Folders, synchronized sources, knowledge pipelines, hybrid retrieval, and reranking help organize the collection and test its quality.

Retrieve the right data, with the right access.

Before a document becomes part of an answer, the caller needs appropriate access. Organization boundaries, departments, and sensitivity levels affect retrieval. Unauthorized documents should not enter the context. In this example, the assistant retrieves the permitted passages needed to prepare the next step.

Customize the workflow to fit your work.

A workflow is not a fixed path. Connect node families for inputs, retrieval, models, branches, loops, data processing, and outputs. Define input variables, run a test, and inspect each step to find problems. Drafts, version history, DSL import and export, and reusable graph snippets support deliberate changes before publication.

AI Gateway: route the model request.

With context ready, the application still needs a route to a model. In this diagram, AI Gateway describes the model orchestration layer in AI Studio. It filters eligible models by policy, manages connection credentials, and can fall back to an allowed model after a suitable error. Both internal and external models must meet the configuration and data policy.

What is allowed to leave the boundary?

Data protection takes several layers. On the chat path, personal information can be masked according to the configured policy. Sensitivity labels determine whether an external provider is allowed. Tool calls also pass destination controls. A disallowed request must be blocked. Masking personal information alone does not make every payload safe to send outside.

Run custom code in a separate sandbox.

For custom logic, a Code node sends work to a separate sandbox service. This execution boundary separates user code from the main process and applies the sandbox limits. The node stays disabled when the service is not configured. A sandbox does not replace permissions or outbound controls; tool calls still need their own policies.

AI drafts. A person decides.

Back to the purchasing request. AI prepares a draft for a responsible person to review. If changes are needed, it returns for revision. Only after approval does this designed workflow continue to the configured tool. Build this gate for actions with consequences; do not assume that every model output should be executed automatically.

Connect tools without hiding their effects.

Connect built-in tools, API tools, MCP servers, or a workflow exposed as a tool. Data source integrations and external knowledge services bring in information from other systems. Moderation extensions require a compatible service contract. Enable only the operations you need and verify access, connection settings, and permitted destinations before use.

From a draft to channels and triggers.

After testing, publish an application to the web, embed a widget, or integrate through API and MCP access with appropriate permissions. Messaging channels need provider-specific setup. Scheduled triggers and webhooks can start workflows with suitable authentication and event configuration. API documentation, access keys, and quotas help manage how other systems call the application.

Conversations, memory and more modalities.

Configure conversation starters, inputs, follow-up questions, and business behavior. Long-term memory includes evidence review, approval, and retention settings tied to a subject. Speech recognition, text-to-speech, and image generation depend on connected models. Enable the capabilities that serve the use case, and review what the application retains.

Measure quality before expanding.

Inspect conversations and run logs to understand what happened. Use evaluation datasets, compatible run comparisons, and annotations to check quality. Monitor usage and operations to detect problems. Data can be prepared for training, while fine-tuning still depends on a runner, resources, and deployment configuration, not just a button.

Manage workspaces and the installation.

Manage members, invitations, roles, keys, and quotas at workspace level. Identity, data protection, model providers, and S3 storage support operations. Instance administrators have separate access to organization and account views, service health, and runtime configuration. Some network and feature-flag screens are read-only inspection surfaces, not direct editing controls.

One platform, several use cases.

The same building blocks can support internal policy questions, assist customer support staff, process documents, or coordinate business approvals. Each application needs its own data sources, access rules, tools, and evaluation criteria. Test within a small scope before expanding.

From a question to a controlled outcome.

AI Studio connects people, knowledge, models, and workflows. The value is more than a faster answer. It is a process you can inspect: where the data came from, which model was called, who made the decision, and what happened. Start with a concrete use case, evaluate quality, and observe operations before expanding.

A guided tour of AI Studio

Seven chapters, English narration and captions. Screens show illustrative data.

Read the transcript

Create your first application

Welcome to AI Studio. This tour covers seven chapters, from building applications, connecting data and automating work to operations and administration. The screens use illustrative data. Available actions depend on permissions and deployment configuration. Create your first application. Build a chatbot, agent, chatflow or workflow. Open Studio and create an application. Choose Chatbot for a conversational assistant, Agent for tool-assisted tasks, or Chatflow/Workflow for a visual flow.Configure variables, opening messages, business processes, speech recognition, text to speech and image generation with suitable models.

Explore model providers

Explore model providers. Compare the provider catalog before configuring models. Open Marketplace and search by provider name or model type.

Connect AI models

Connect AI models. Choose the models your workspace can use. Open Integrations → Model provider and select a provider from the catalog. Enter its endpoint and credentials as required.

Manage your account

Manage your account. Keep sign-in details and personal preferences up to date. Open your account from the user menu to review your profile and account settings.

Build a knowledge base

Build a knowledge base. Ground answers in your own documents. Open Knowledge and create a knowledge base. Upload documents or connect a supported source, then select the parsing and indexing settings.

Manage documents and chunks

Manage documents and chunks. Track ingestion, inspect original documents and manage chunks used for retrieval. Open Knowledge, select a base and open its document list. Upload files or use a connected source.

Test and tune retrieval

Test and tune retrieval. Inspect retrieved context before using it in answers. Select a knowledge base, open Retrieval and enter a realistic question. Inspect the returned chunks and scores. Economy indexing has no vectors and only supports full-text search. Reranking adds a model call and may send chunk content to the selected provider.

Design knowledge ingestion pipelines

Design knowledge ingestion pipelines. Choose a template and customise how data enters a knowledge base. Open Knowledge → Custom to review available pipeline templates.

Connect data sources

Connect data sources. Reuse source connections for document ingestion. Open Integrations → Data sources and add a supported connection. Enter its configuration and credential references.

Connect external knowledge

Connect external knowledge. Connect an existing retrieval service in your organisation. Open Settings → External knowledge and register a service name, endpoint and required key. This service receives outbound queries; it differs from a source that imports documents. The destination must satisfy connection policies and data labels.

Give agents tools

Give agents tools. Connect built-in tools, HTTP APIs and MCP servers. Open Integrations → Tools. Choose a built-in provider, add an API tool or configure an MCP server with its endpoint and authentication.

Use extension APIs for moderation

Use extension APIs for moderation. Register a moderation endpoint managed by your organisation. Open Integrations → Extension and enter a name, endpoint URL and an API key if required. An extension is an HTTP call to your endpoint, not a downloaded executable plugin. The endpoint receives user messages and follows outbound-access policy.

Design visual workflows

Design visual workflows. Connect processing steps and inspect each run. Open a Workflow or Chatflow app and enter its workflow editor. Define input fields on the start node.

Automate with triggers

Automate with triggers. Start workflows from events or schedules. Open Integrations → Triggers to review the available types and existing workspace triggers. To create one, open the target Workflow app, save its draft and select the root/start node. Configure the trigger in that node’s Triggers panel; triggers are not created from the workspace overview.

Review approval requests

Review approval requests. Keep a human decision in approval-gated flows. Open the approval inbox to find requests you are allowed to review. Select a pending request.

Publish and share

Publish and share. Deliver a tested version through the right channel. Open the app, test its draft and publish the version you want users to run. Draft edits need a new publication to reach users.

Use the application API and MCP

Use the application API and MCP. Integrate published apps into another system. Open an app → API access and read its generated endpoint, input schema and examples. Publish the app before calling its published interface.

Read logs and execution traces

Read logs and execution traces. Trace application results back to conversations or execution steps. Open an application and select Logs. The list shows conversations or workflow runs depending on application type.

Set up canned answers

Set up canned answers. Provide consistent answers to explicitly matched questions. Inside an application, open the logs and canned-answers area. An exact match after normalisation returns the canned answer without a model call. Approximate matching is not used.

Monitor usage and quality

Monitor usage and quality. Understand runs, costs, feedback and audit events. Open Operations and select the relevant time range and filters. Review activity, token usage, cost and quality indicators.Inside an application, create evaluation datasets, run tests and compare compatible runs; export training data when needed.

Manage long-term memory

Manage long-term memory. Review and govern information retained across interactions. An authorized memory administrator opens Memories to review the dashboard and extraction queue. Check items and their source context before acting.

Manage your workspace

Manage your workspace. Organize members, roles, API keys and quotas. Use the workspace menu to select the right workspace. Open Workspace settings to manage members and invitations.

Create roles and assign permissions

Create roles and assign permissions. Define workspace permissions around team responsibilities. Open Settings → Custom roles using an account allowed to manage roles. Workspace roles do not automatically grant instance administration. Check both allowed operations and operations that must be denied.

Configure data protection

Configure data protection. Align AI usage with your organization’s data policies. Open Settings → Data protection to review sensitivity levels and the available PII, OCR and data-handling policies.

Set up branding, storage and identity

Set up branding, storage and identity. Configure workspace services from dedicated settings pages. Use Branding to set the workspace identity. Open Storage to configure the available S3 storage settings and verify access before using it for documents.

Manage S3 storage

Manage S3 storage. Monitor the bucket, storage use and unreferenced objects. Open Settings → Storage to inspect bucket status, use, object counts and measurement time.

Configure single sign-on

Configure single sign-on. Connect an identity provider and map user groups. Open Settings → Single sign-on. Add the issuer, client ID and credentials supplied by the identity administrator.

Fine-tune a model

Fine-tune a model. Submit and track training through configured providers. Open Settings → Model training and review the available training channels. Unavailable channels are identified in the page.

Administer the instance

Administer the instance. Operate the installation beyond a single workspace. Sign in with an instance administrator account and open Administration. Workspace ownership alone does not grant instance administration.Instance administration also includes organisations, accounts, service health, runtime settings, network rules and feature flags. Instance administration is separate from workspace roles. For step-by-step practice, open the corresponding guide on the AI Studio website. Thank you for watching.

Explore every area of AI Studio

From application design to instance administration. Open a topic for practical steps; available actions depend on permissions and deployment configuration.

Getting started4
Application design5
Knowledge & data8
Workflows & automation8
Tools & integrations5
Publishing & quality13
Workspace management10
Instance administration7

Start small. Build step by step.

  1. 01

    Prepare your knowledge

    Choose documents and define what you want AI to help with.

  2. 02

    Build and test

    Create an application, write instructions, and try real questions.

  3. 03

    Publish and monitor

    Release a reviewed version and inspect its activity.

Book a demo

See AI Studio through your own use case.

Walk through a relevant workflow with Duy, discuss your data and integrations, and identify a practical starting point.

  • Your use case and current process
  • A guided tour of relevant features
  • Data, permissions and integration needs

Book a demo

Send your use case, team size and a few suitable times. The meeting time will be confirmed in the conversation.

Message Duy to arrange a demo

Your first AI application
starts with your work.

Follow step-by-step guides with screenshots to help you along the way.